Now we have finished the coding process for our client project. Click on the Clean and Build Main Project button to build our project. Before running and testing our client project, make sure that our Web Service application project, WebAppCourse, has been built and deployed successfully. Click on the Run Main Project button to run our client project to perform the data insertion action.
In the opened client project, keep the default faculty member Ying Bai unchanged and click on the Select button to query all course _ id taught by this selected faculty member. Immediately you can see that all four courses (course _ id) taught by this faculty member have been returned and displayed in the Course ID List box. To insert a new course, enter these six pieces of new course information into the six TextFields on the right.
| • | Course ID: | CSE-549 |
| • | Course: | AdvancedFuzzy Systems |
| • | Schedule: | T-H: 1:30–2:45 PM |
| • | Classroom: | TC-302 |
| • | Credit: | 3 |
| • | Enrollment: | 25 |
Your finished CourseFrame window should match the one shown in Figure 9.92. Click on the Insert button to insert this new course record into the Course Table in our sample database. Immediately all six TextFields containing six pieces of information for a new course record are cleaned up to enable users to confirm the data insertion action.
To confirm the new course insertion action, two method scan be used. The easiest way is to use the Select button, that is, the code inside the event handler of that button, to try to retrieve all courses, that is, all course _ id, taught by the selected faculty member, Ying Bai. To do this, just click on the Select button to perform a query to get all course _ id taught by that faculty member. The run result is shown in Figure 9.93.
As shown in Figure 9.93, one can find that the new inserted course, CSE-549, has been retrieved and displayed in the Course ListBox. Click on that new course _ id in the CourseListBox, and the details about that course are displayed in six TextFields, as shown in Figure 9.93. Click on the
Back button to terminate our client project.
The second way is to open the Course Table in our sample database to do this check. One can use the Databases icon inside the Services window in the NetBeans IDE 12.0 to connect to our sample database, CSE _ DEPT.
Todothat,opentheServiceswindowandexpandtheDatabasesicon,thenright-clickonourdata-base connection URL, jdbc:oracle:thin:@localhost: 1251:XE;, and select the Connect item. One may need to enter oracle _ 18c into the Password box to do this connection. Then expand our database and Tables in the sequence of CSE _ DEPT → Tables → COURSE. Then right-click on the COURSE Table and select the View Data item to open the Course Table. Browse to line 32 on this Table, and you can see that our new inserted course, CSE-549, has been added there, as shown in Figure 9.94.
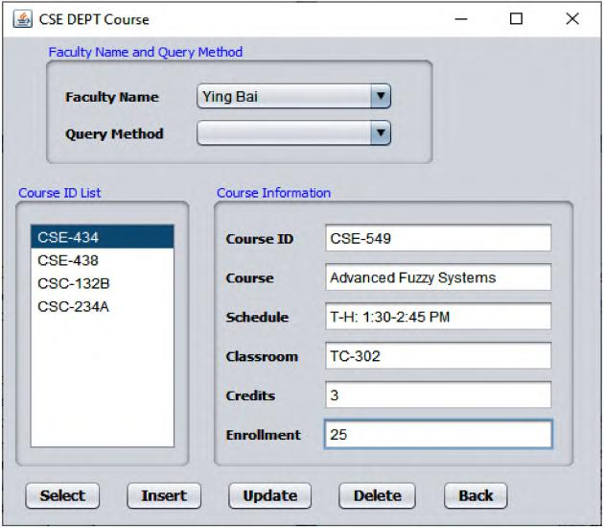
FIGURE 9.92 The new course record to be inserted into our database.
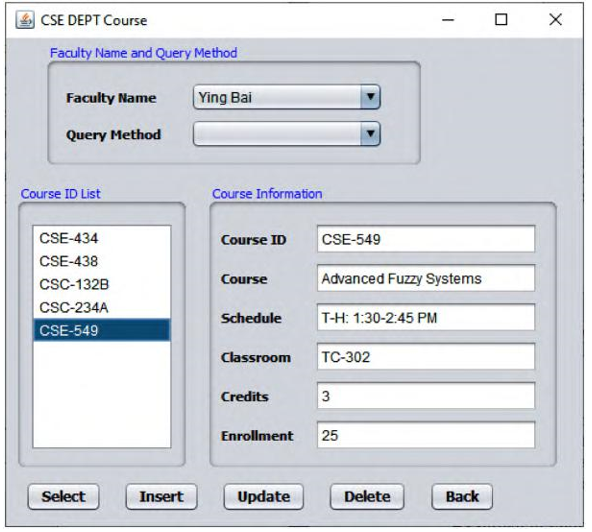
FIGURE 9.93 The check result for our new inserted course record.

FIGURE 9.94 The new inserted course record in our sample database.
A complete Window-based consuming project, WinClientCourse _ Insert, can be found in the folder Class BD Projects\Chapter 9 in the Students folder at the CRC Press ftp site (refer to Figure 1.2 in Chapter 1).
Next let’s discuss how to perform a course update action to update an existing course in our sample database via Web service.